Authentication
In this guide, we'll show you how to set up authentication in the NextAdmin boilerplate using Better-Auth (opens in a new tab).
1. Core Configuration
To get started, update the following environment variables in your .env file to configure NextAuth.
BETTER_AUTH_SECRET="YOUR_SITE_URL"
BETTER_AUTH_URL="A_RANDOM_STRING"
NOTE: For local development, set
BETTER_AUTH_URLtohttp://localhost:3000. For production, use your live site URL.
Generate a Secret
You can generate a secure random string for BETTER_AUTH_SECRET using the following terminal command:
openssl rand -base64 322. Google OAuth Integration
Set up your Google OAuth credentials (opens in a new tab) and add your Client ID and Client Secret into your .env file:
GOOGLE_CLIENT_ID="YOUR_GOOGLE_CLIENT_ID"
GOOGLE_CLIENT_SECRET="YOUR_GOOGLE_CLIENT_SECRET"
How to Get Google OAuth Credentials?
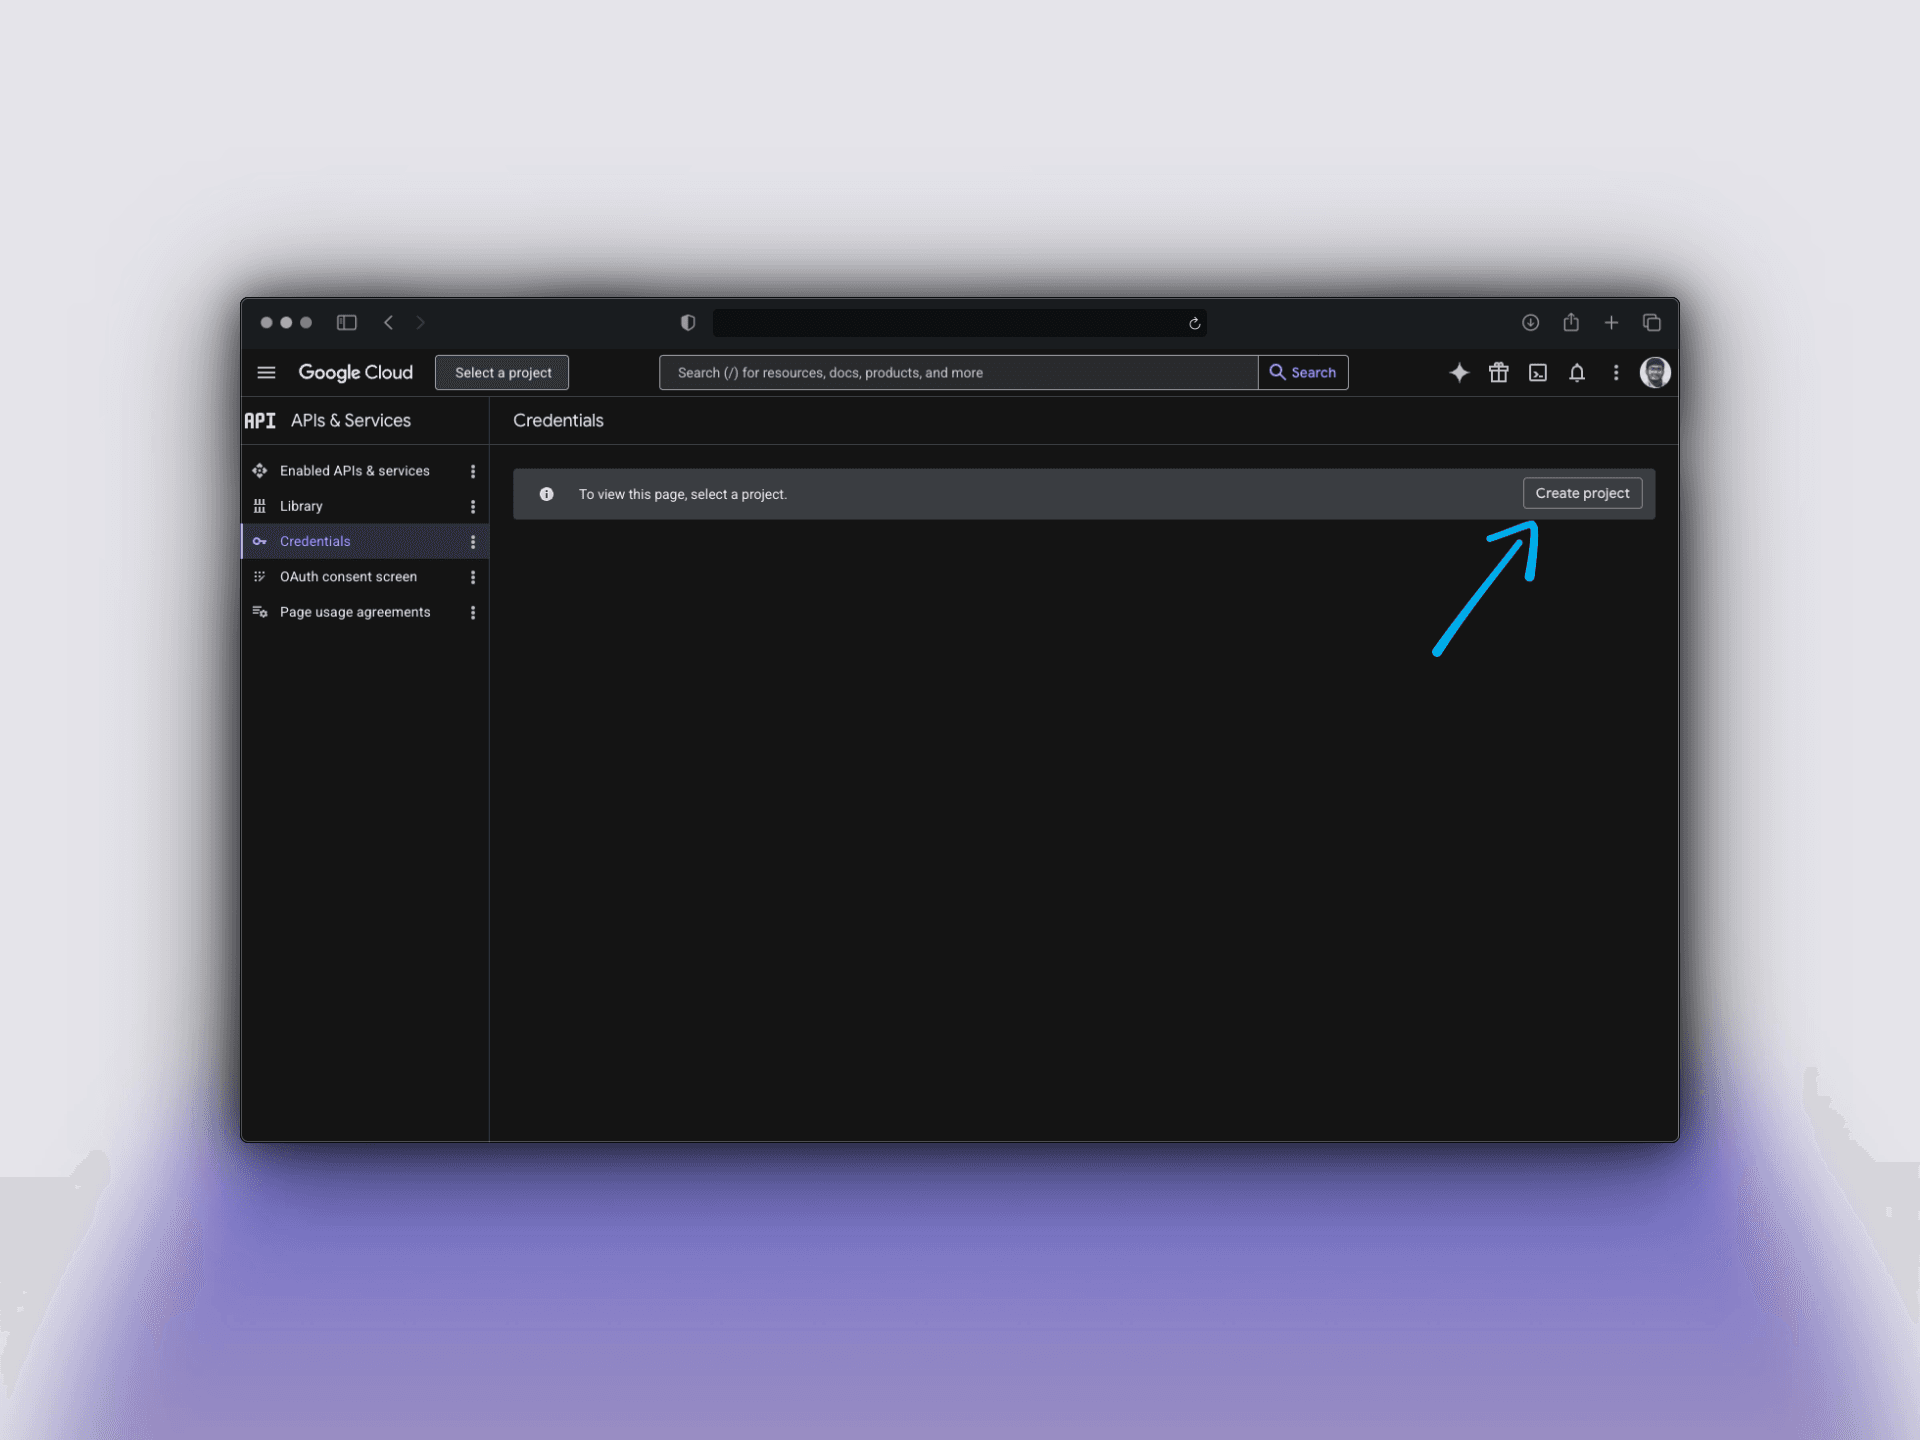
Follow these steps to setup an Google Cloud project and get OAuth credentials.
-
Navigate to the Google Cloud Console (opens in a new tab).
-
Click on the New Project button at the top and follow the steps to create one.
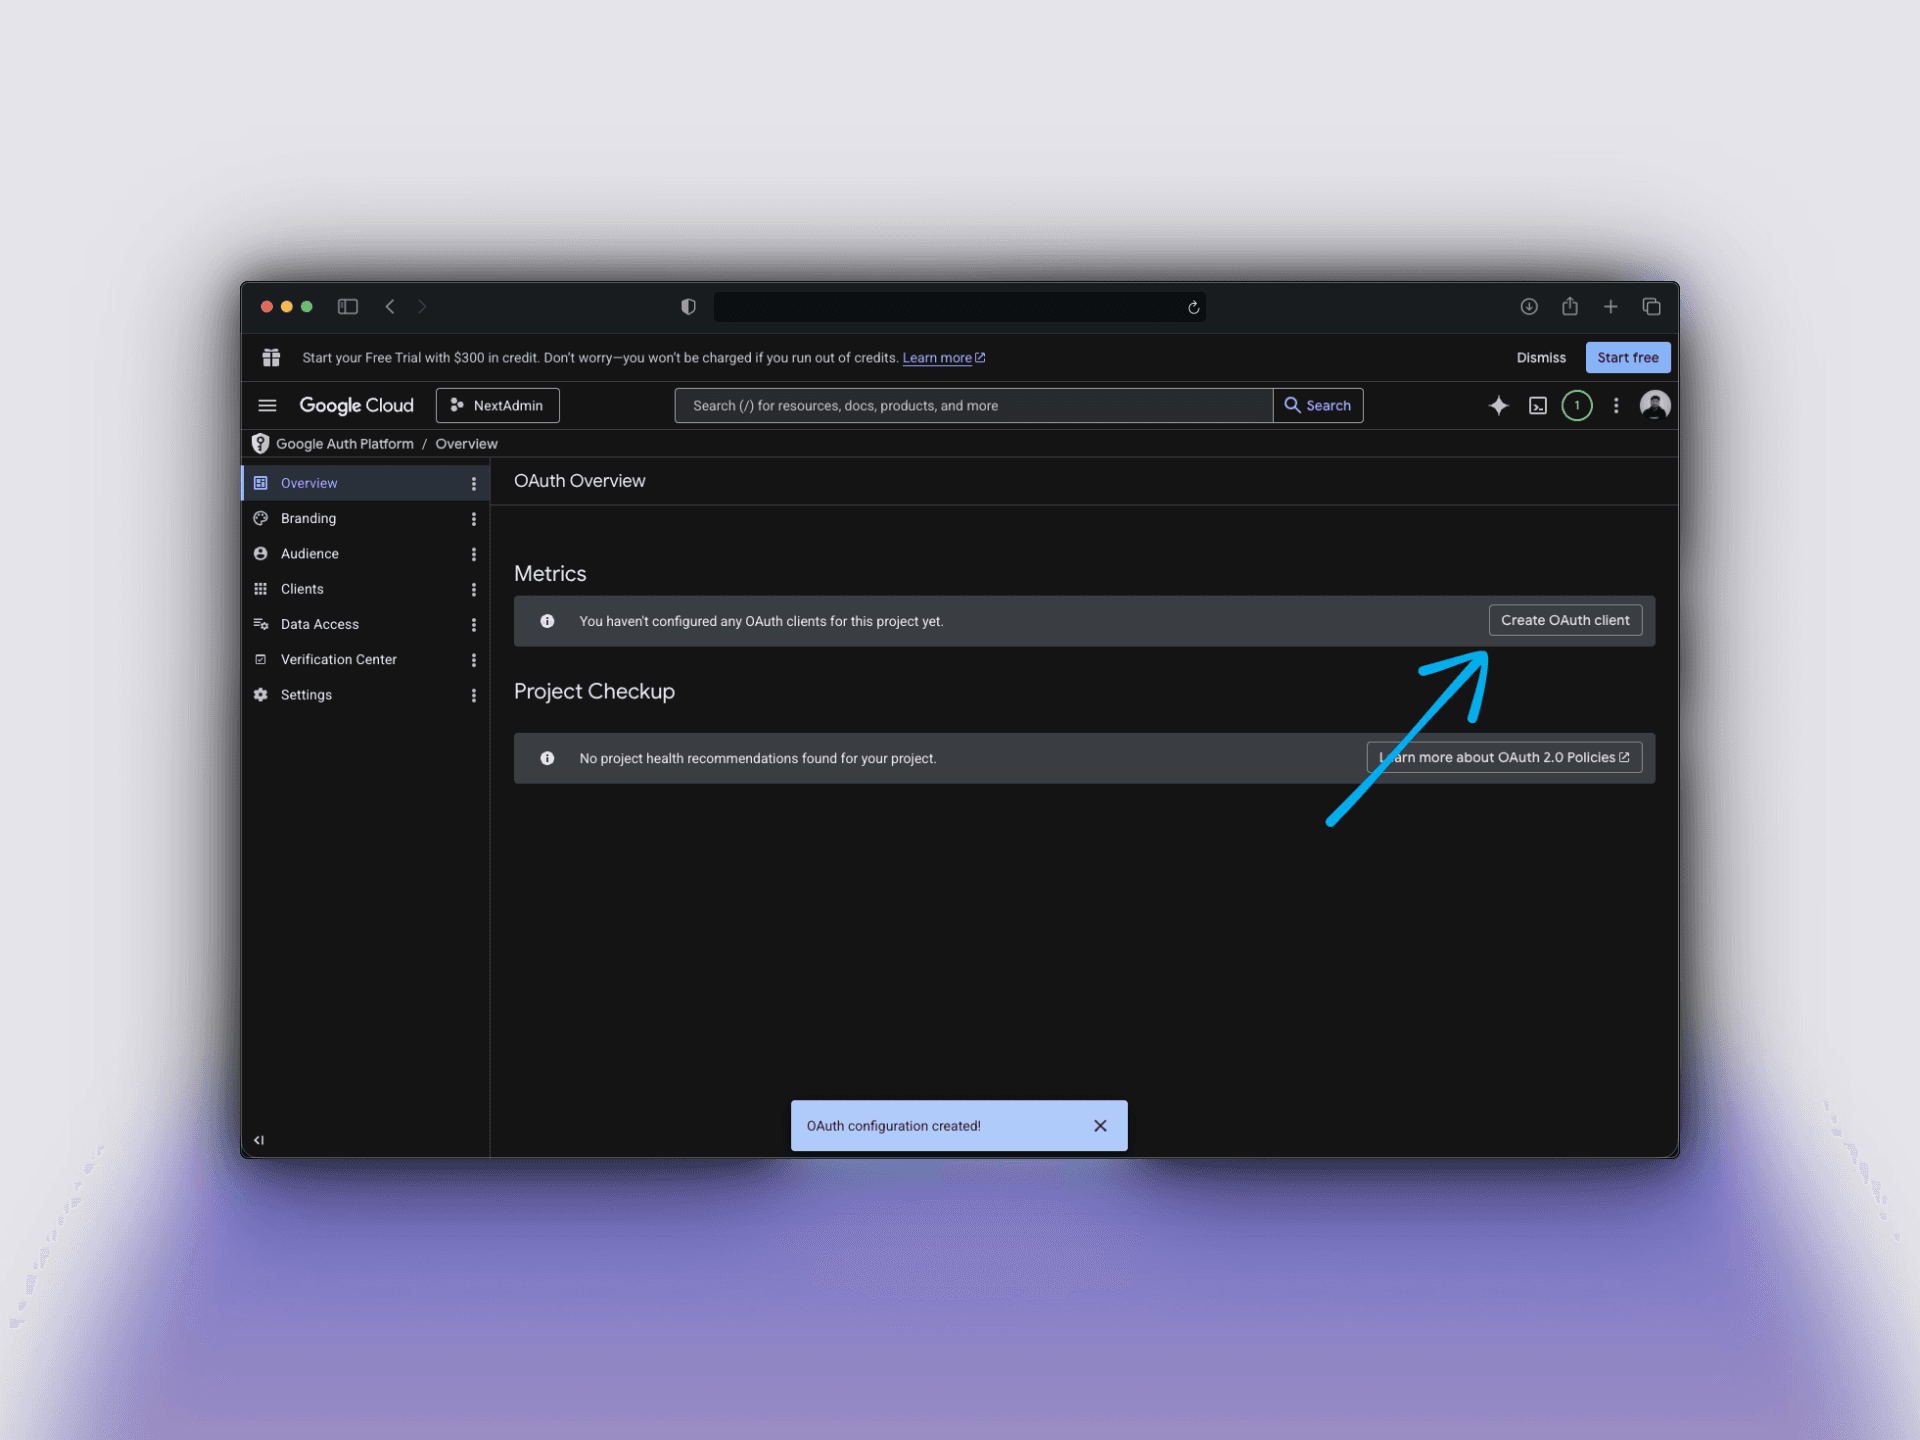
- Now click on the Configure consent screen and follow the steps to set up the OAuth consent screen. You can select External for user type and fill in the required fields.
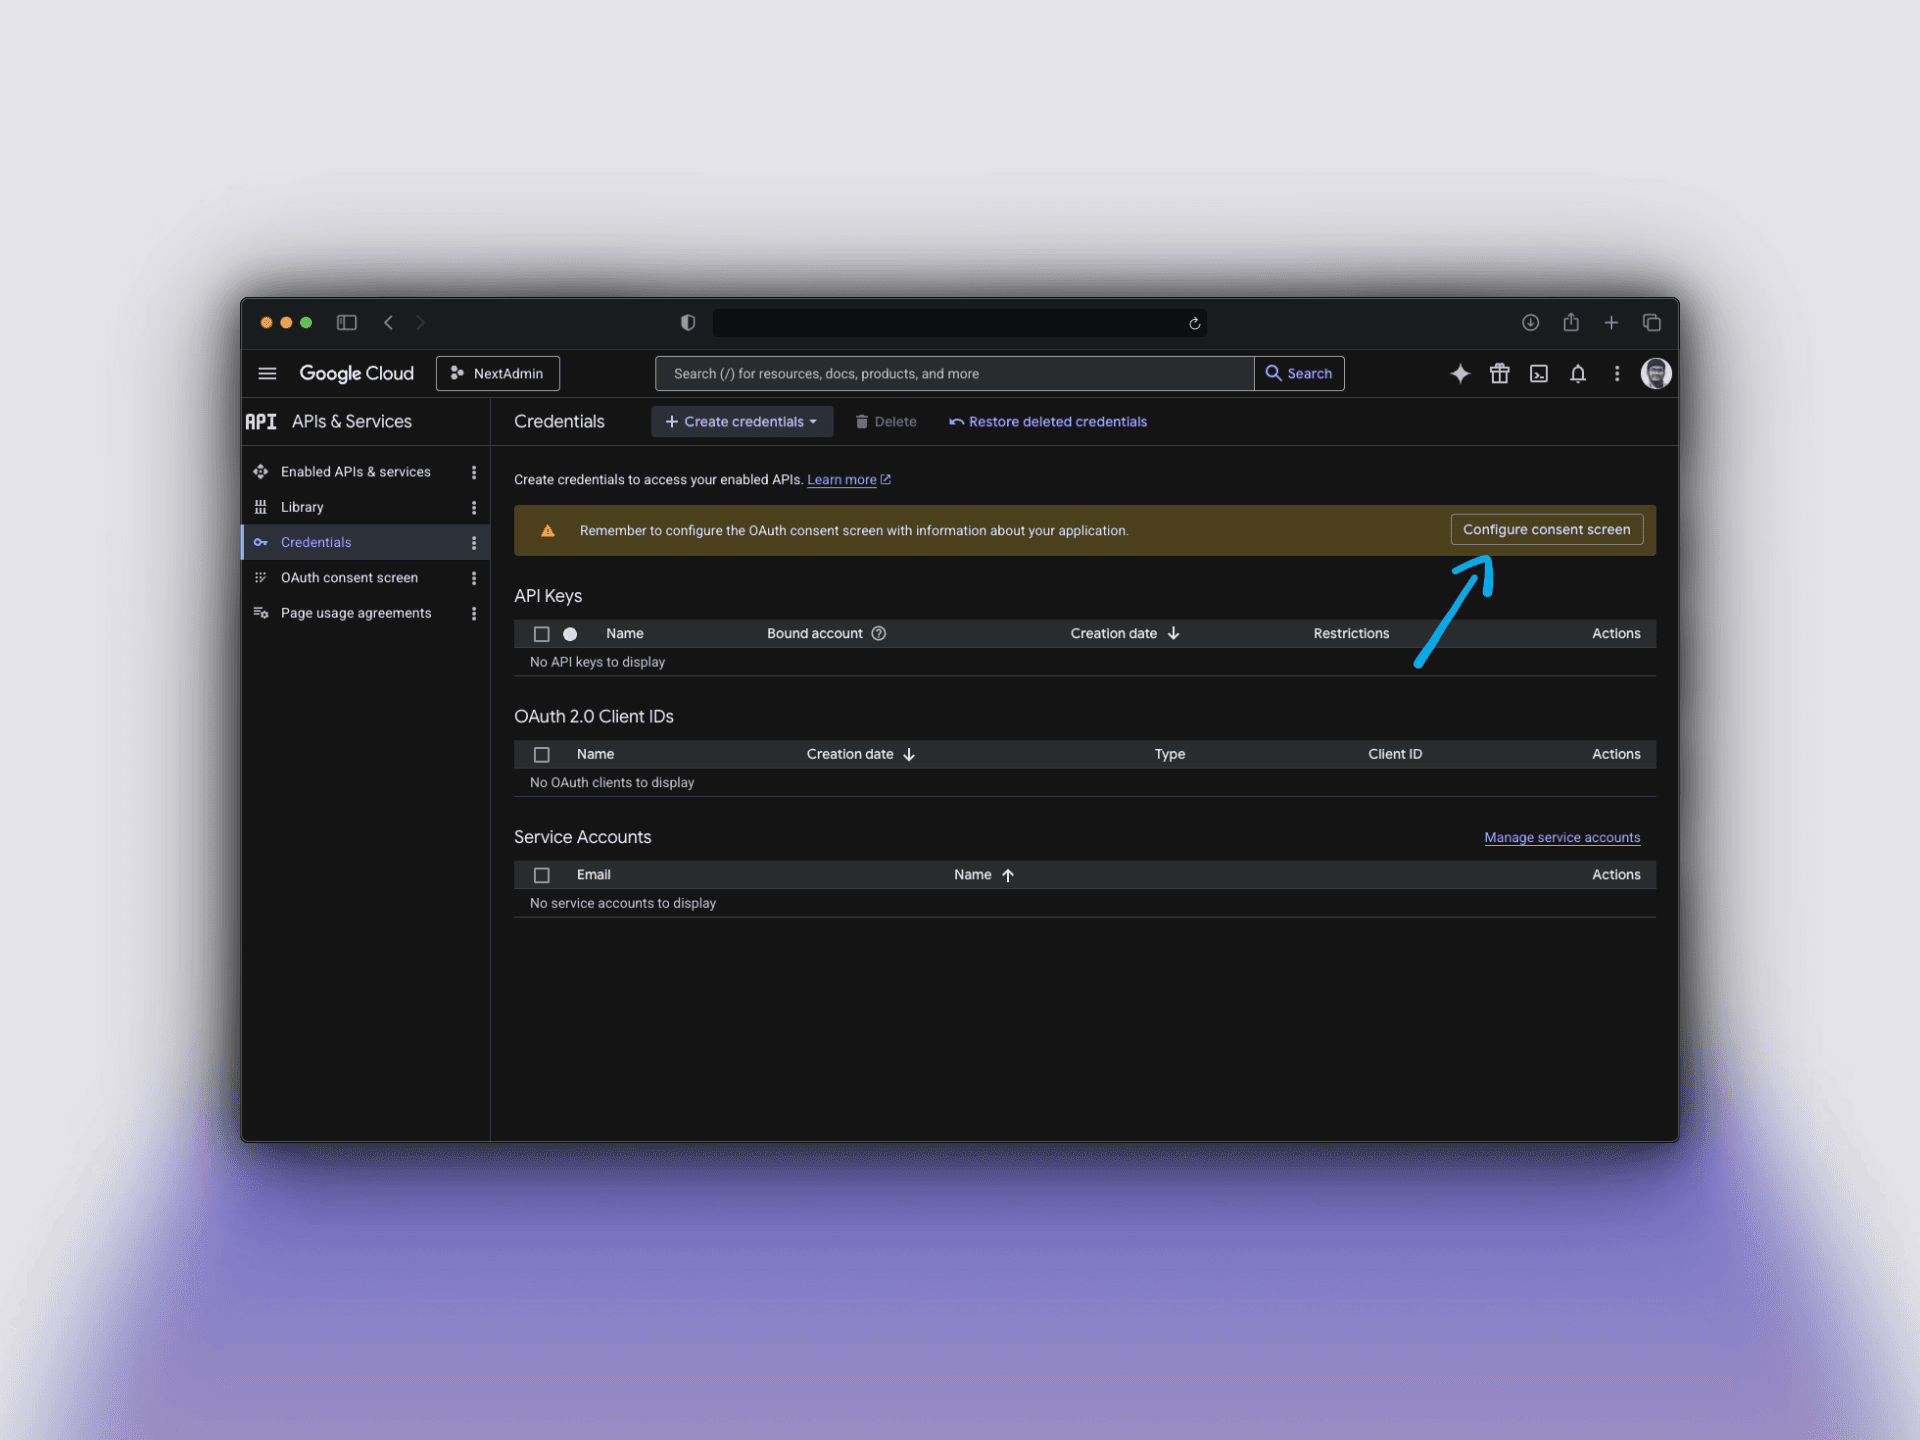
- After setting up the consent screen, click on Create OAuth client to create a new OAuth client.
If you don't see the Create OAuth client button, go back to Credentials (opens in a new tab) tab and click on Create Credentials dropdown and select OAuth client ID.
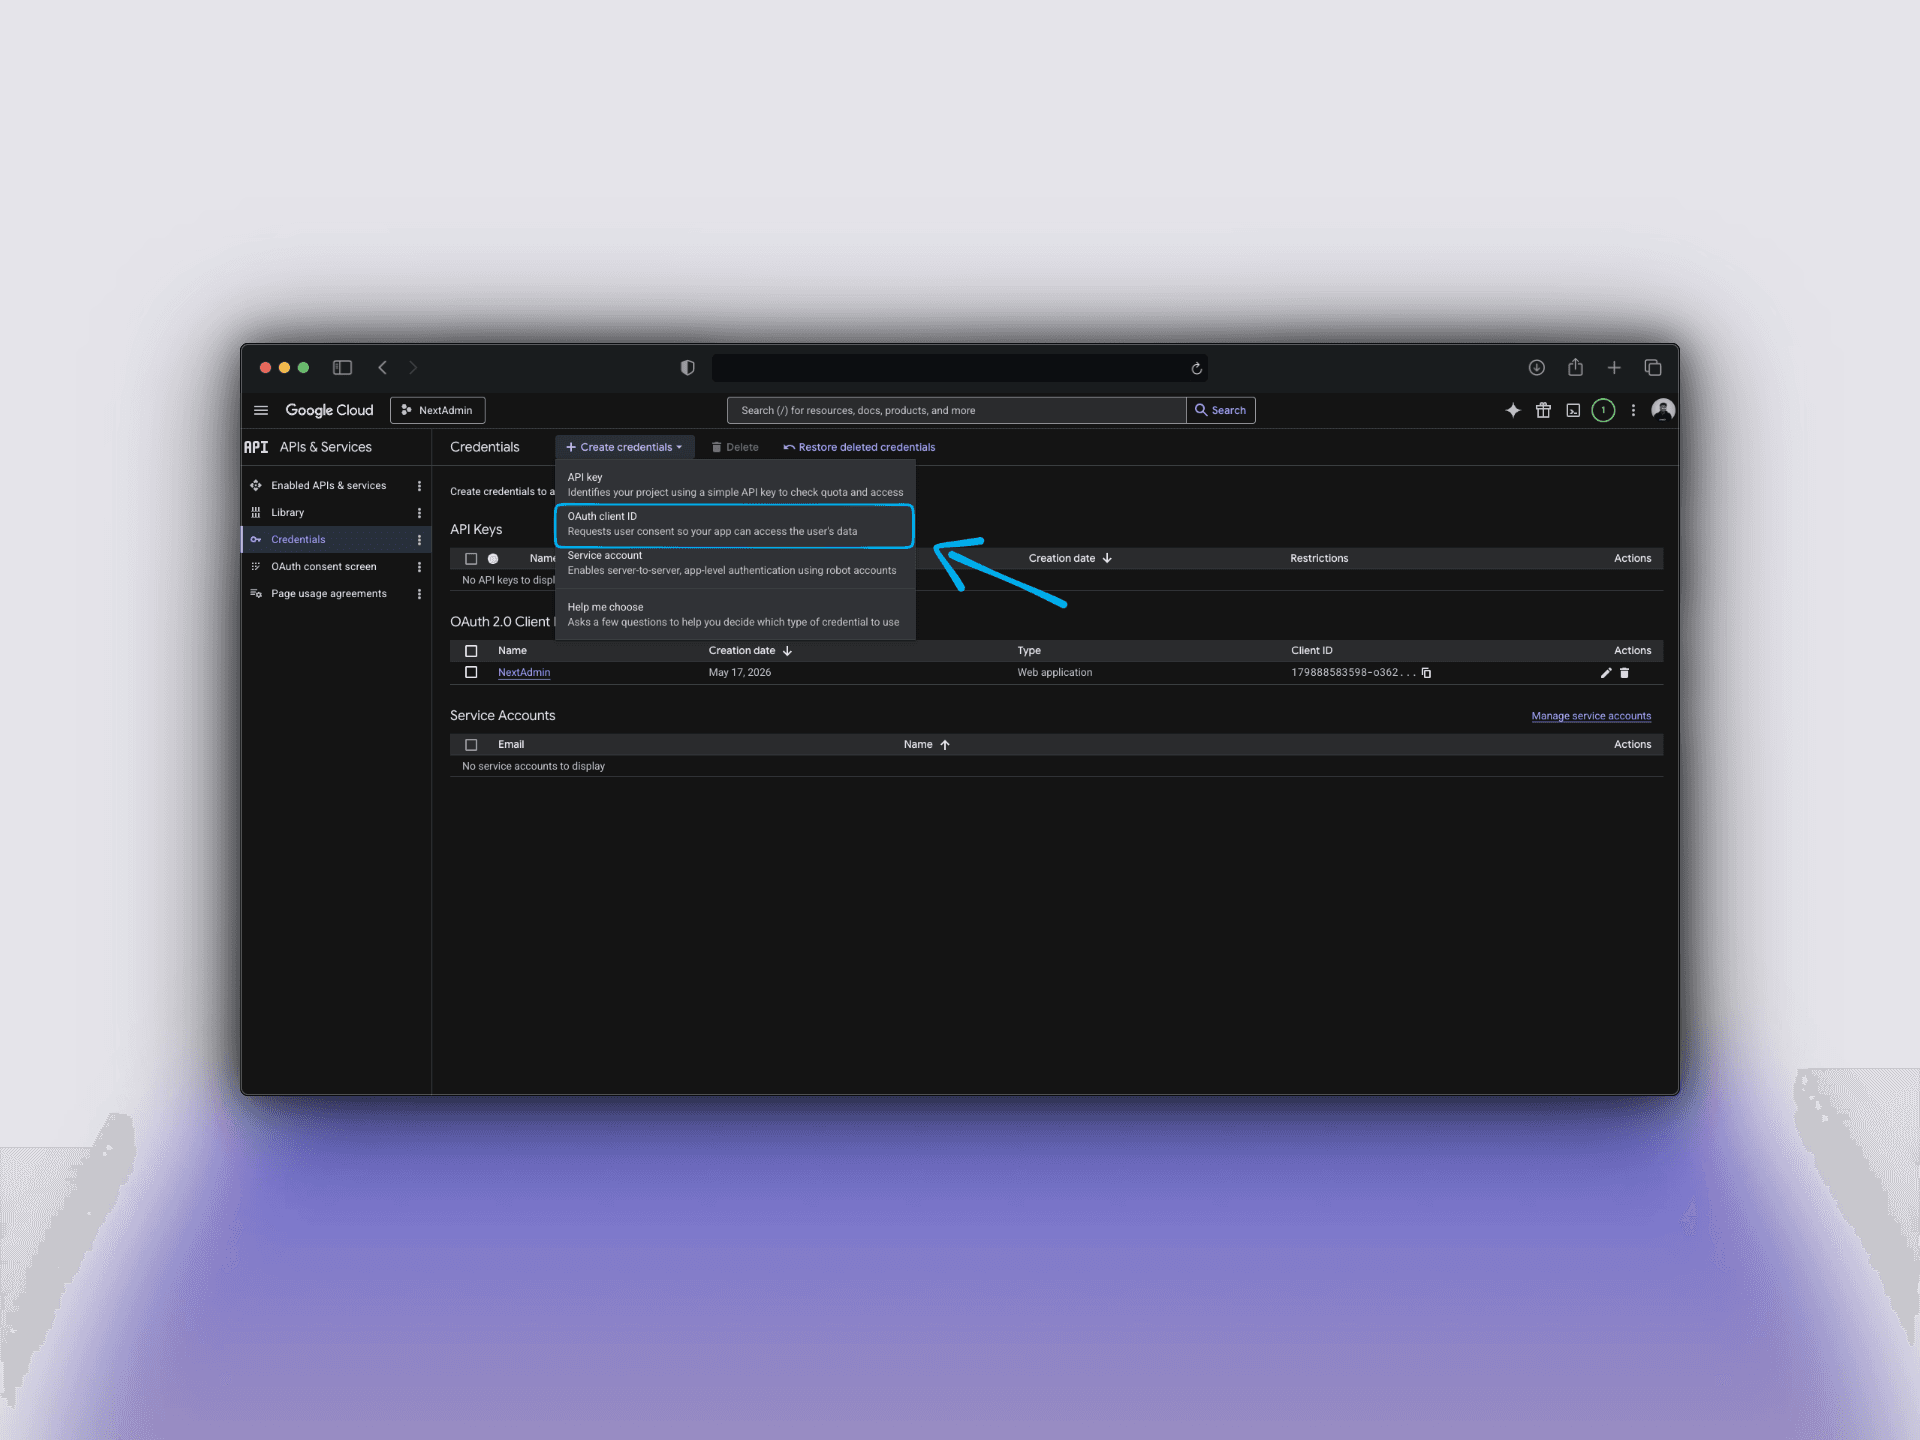
- When creating your OAuth client ID, select Web application and fill in the fields properly. Add the following for Authorized JavaScript Origins and Authorized redirect URIs:
- Authorized JavaScript Origins:
http://localhost:3000(for development)
- Authorized redirect URIs:
http://localhost:3000/api/auth/callback/google(for development)https://{YOUR_DOMAIN}/api/auth/callback/google(for production)
- After creating the OAuth client, copy the Client ID and Client Secret and update your
.envfile.
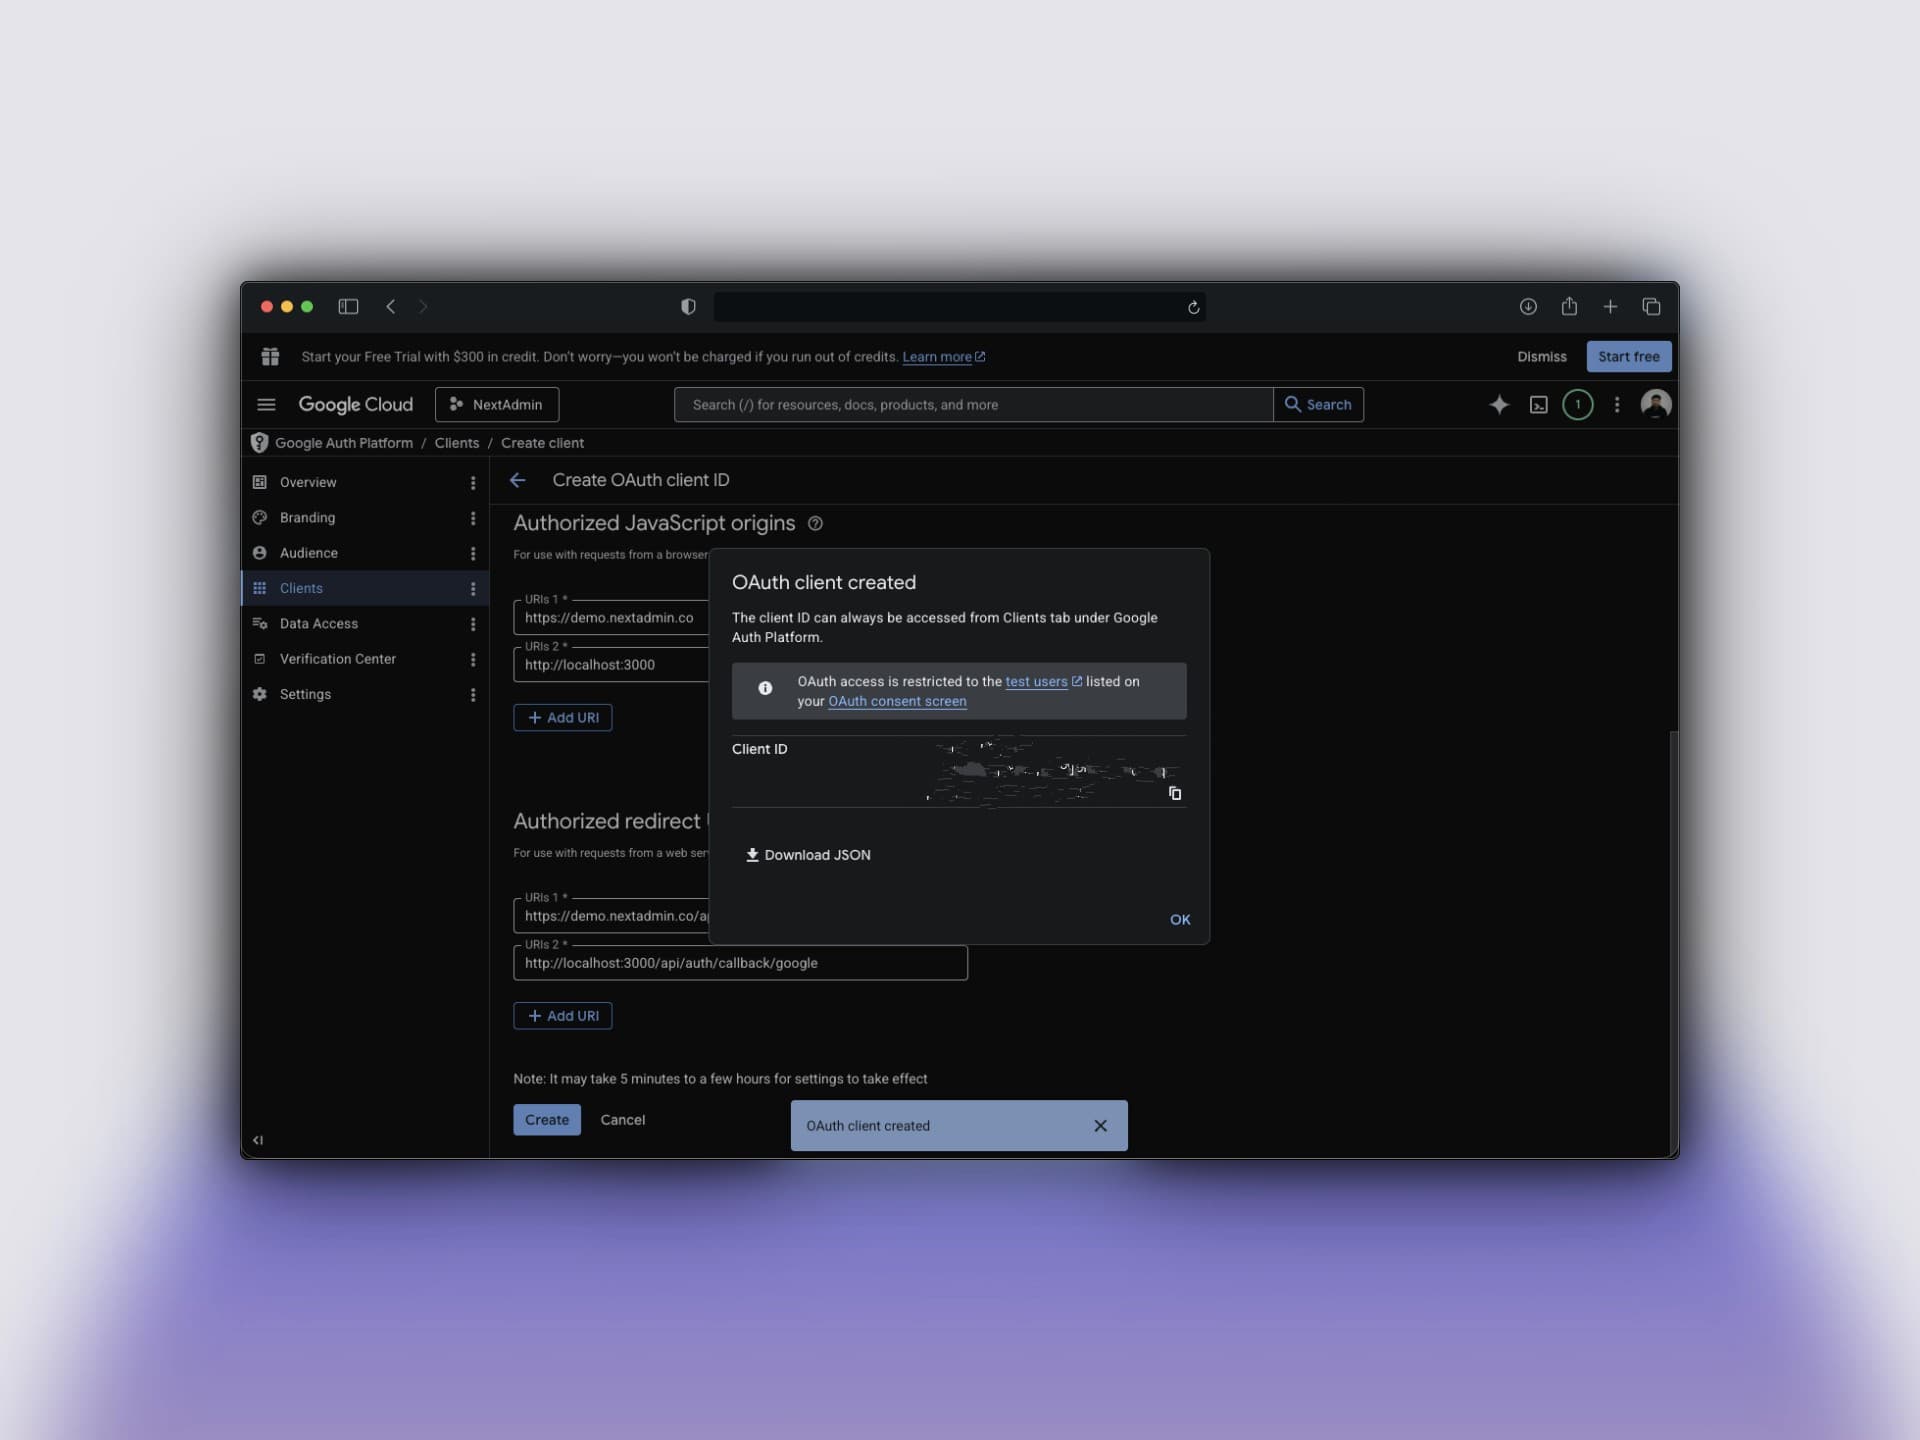
NOTE: Once you close this window, you won't be able to see the Client Secret again. If you lose it, you'll need to regenerate it from the Google Cloud Console. So make sure to copy and save it securely.
Next Steps
With authentication configured, users can now securely sign in to your admin dashboard!