File Uploads
In this guide, we'll show you how to set up file uploads in the NextAdmin boilerplate. By default, we use Cloudflare R2, but you can use any S3-compatible storage provider.
1. Create a Cloudflare R2 Bucket
- Log in to your Cloudflare Dashboard (opens in a new tab).
- Navigate to R2 > Create Bucket.
- Choose a bucket name and click Create Bucket.
- Update your
.envfile with the bucket name:
.env.local
R2_BUCKET_NAME="YOUR_BUCKET_NAME"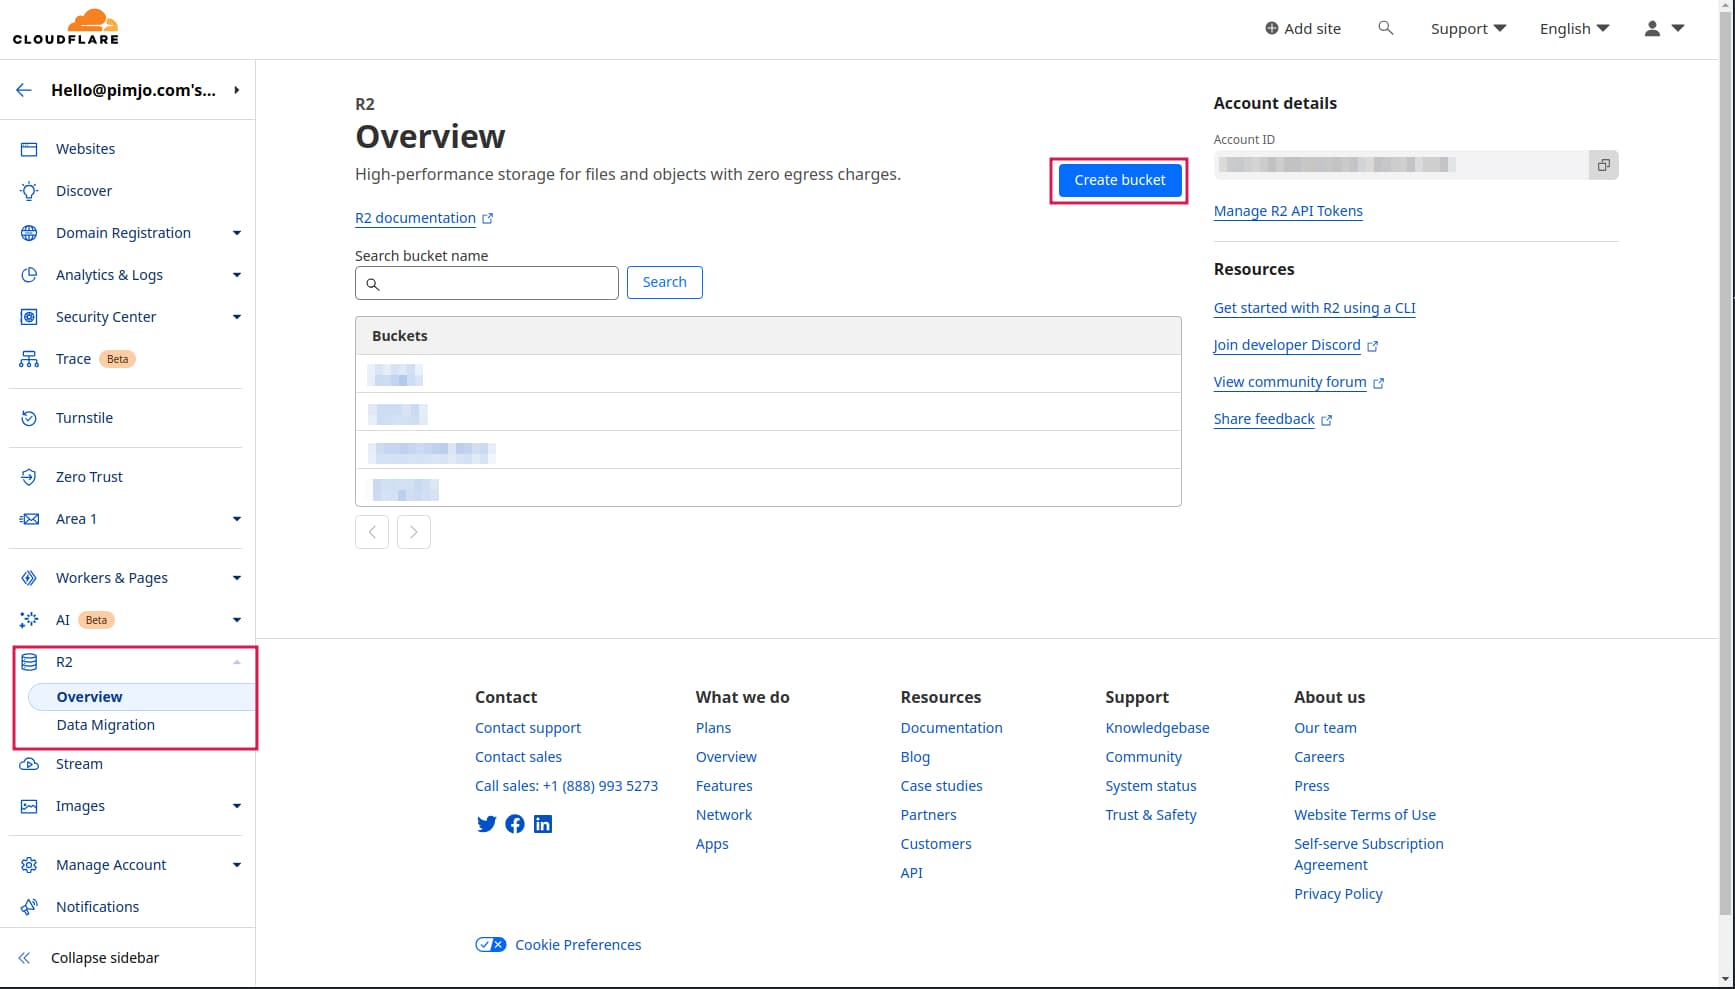
2. Generate API Credentials
To allow your application to interact with the R2 bucket, you need to generate an API token.
-
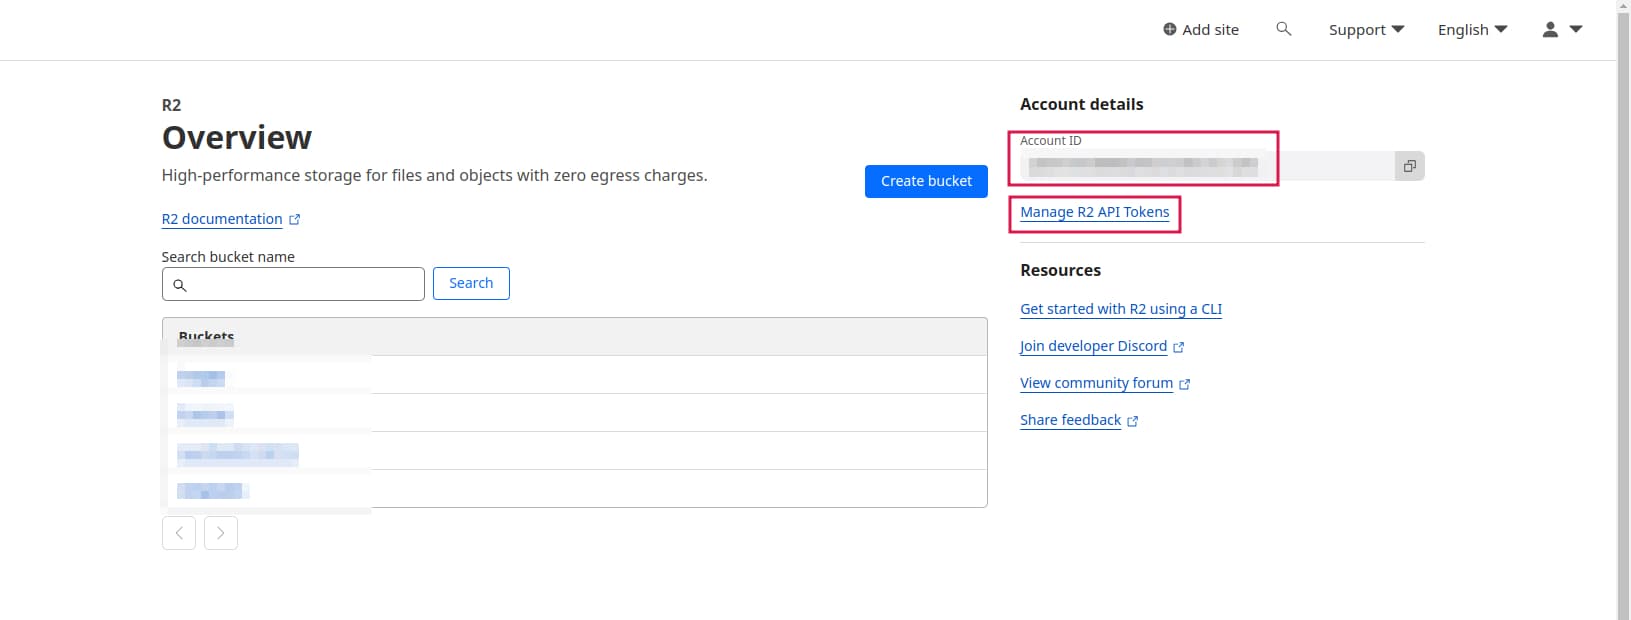
From the R2 overview page, copy your Account ID and add it to your
.envfile:.env.localR2_ACCOUNT_ID="YOUR_ACCOUNT_ID" -
Click on Manage R2 API Tokens.
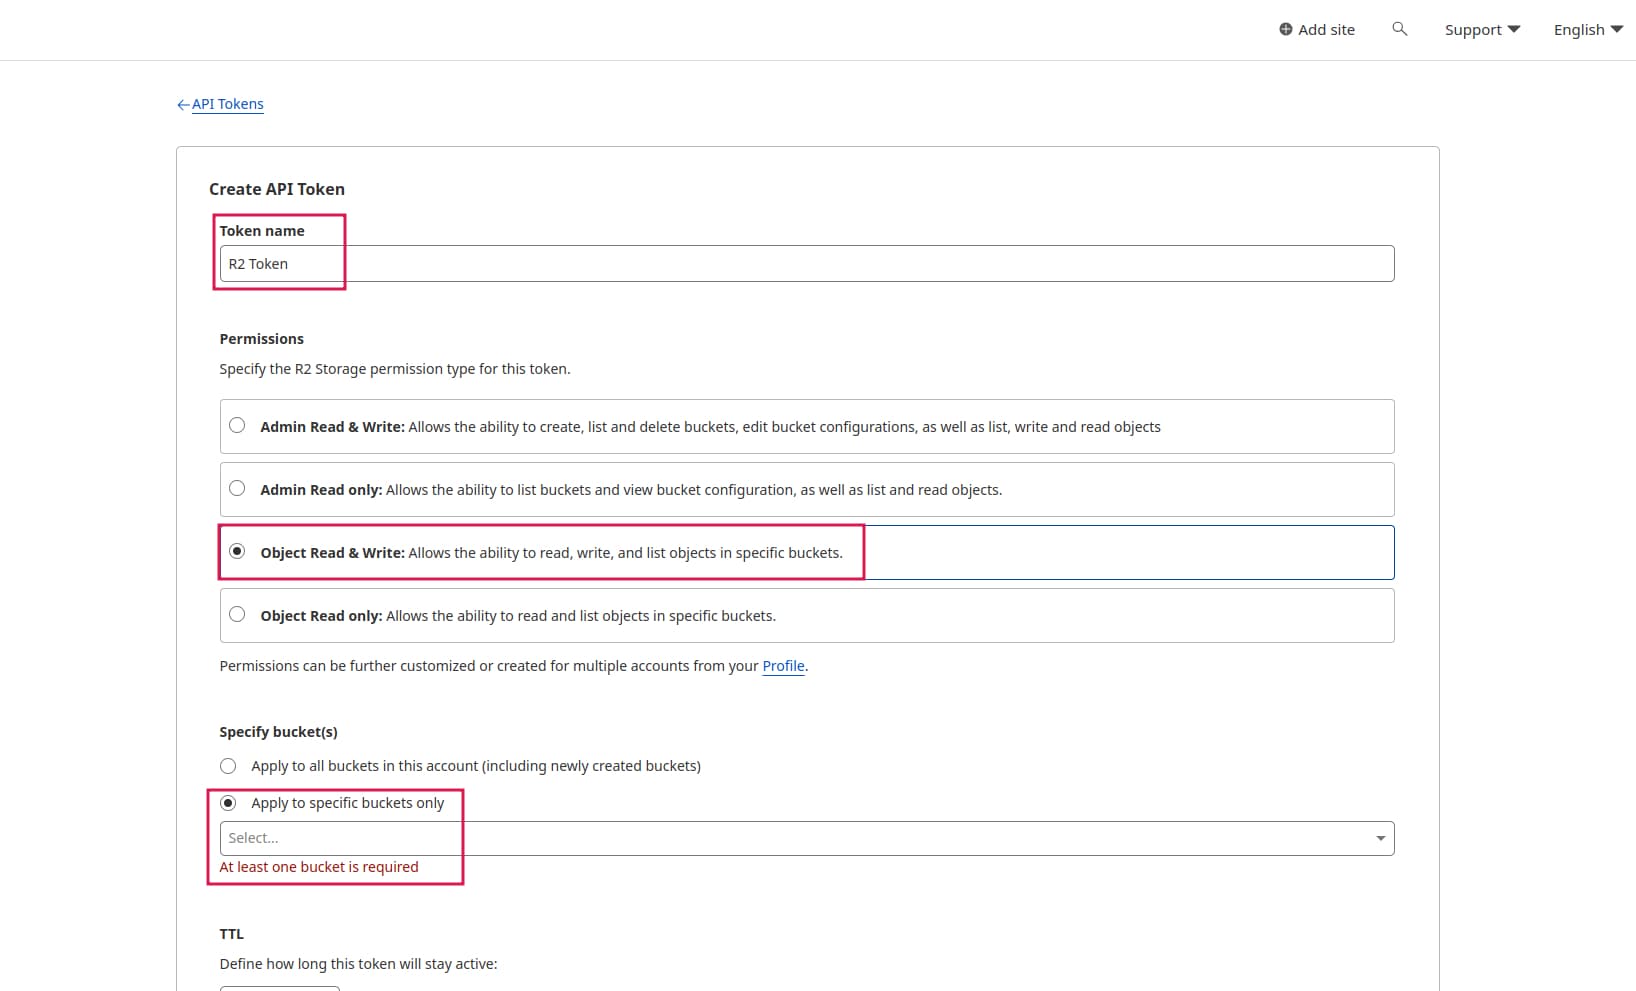
- Click Create API token.
- Set the Token name, select Object Read & Write permissions, and choose the bucket you just created.
- Click Create API Token.
- Copy the Access Key ID and Secret Access Key to your
.envfile:
.env.local
R2_ACCESS_KEY_ID="YOUR_ACCESS_KEY_ID"
R2_SECRET_ACCESS_KEY="YOUR_SECRET_ACCESS_KEY"
3. Configure CORS Policy
To enable file uploads directly from your application, you must configure the CORS policy.
- Go to your Bucket > Settings.
- Scroll down to the CORS Policy section and click Edit CORS Policy.

- Paste the following configuration and save:
[
  {
    "AllowedOrigins": ["*"],
    "AllowedMethods": ["PUT", "GET"],
    "AllowedHeaders": ["*"],
    "ExposeHeaders": [],
    "MaxAgeSeconds": 3000
  }
]
Next Steps
Your file upload integration is now complete! You can use the built-in upload actions for user profiles or extend them for other resources like product images or documents.